
Arduino Mega Ramps 1.4 Ramps 1.4 REPRAP 3D/CNC shield til Arduino
Happy Hour is every day from 4-6 pm (10% OFF Food, 20% OFF Cocktails, 30% OFF Wines, and 40% OFF Beers). There's a parking structure behind at 250 N Orange St, Glendale, CA 91203 (I think the first 90 min was free, not sure of the rate after, but I was parked there for more than 2 hours (because we got ice cream at salt & straw afterward), and.
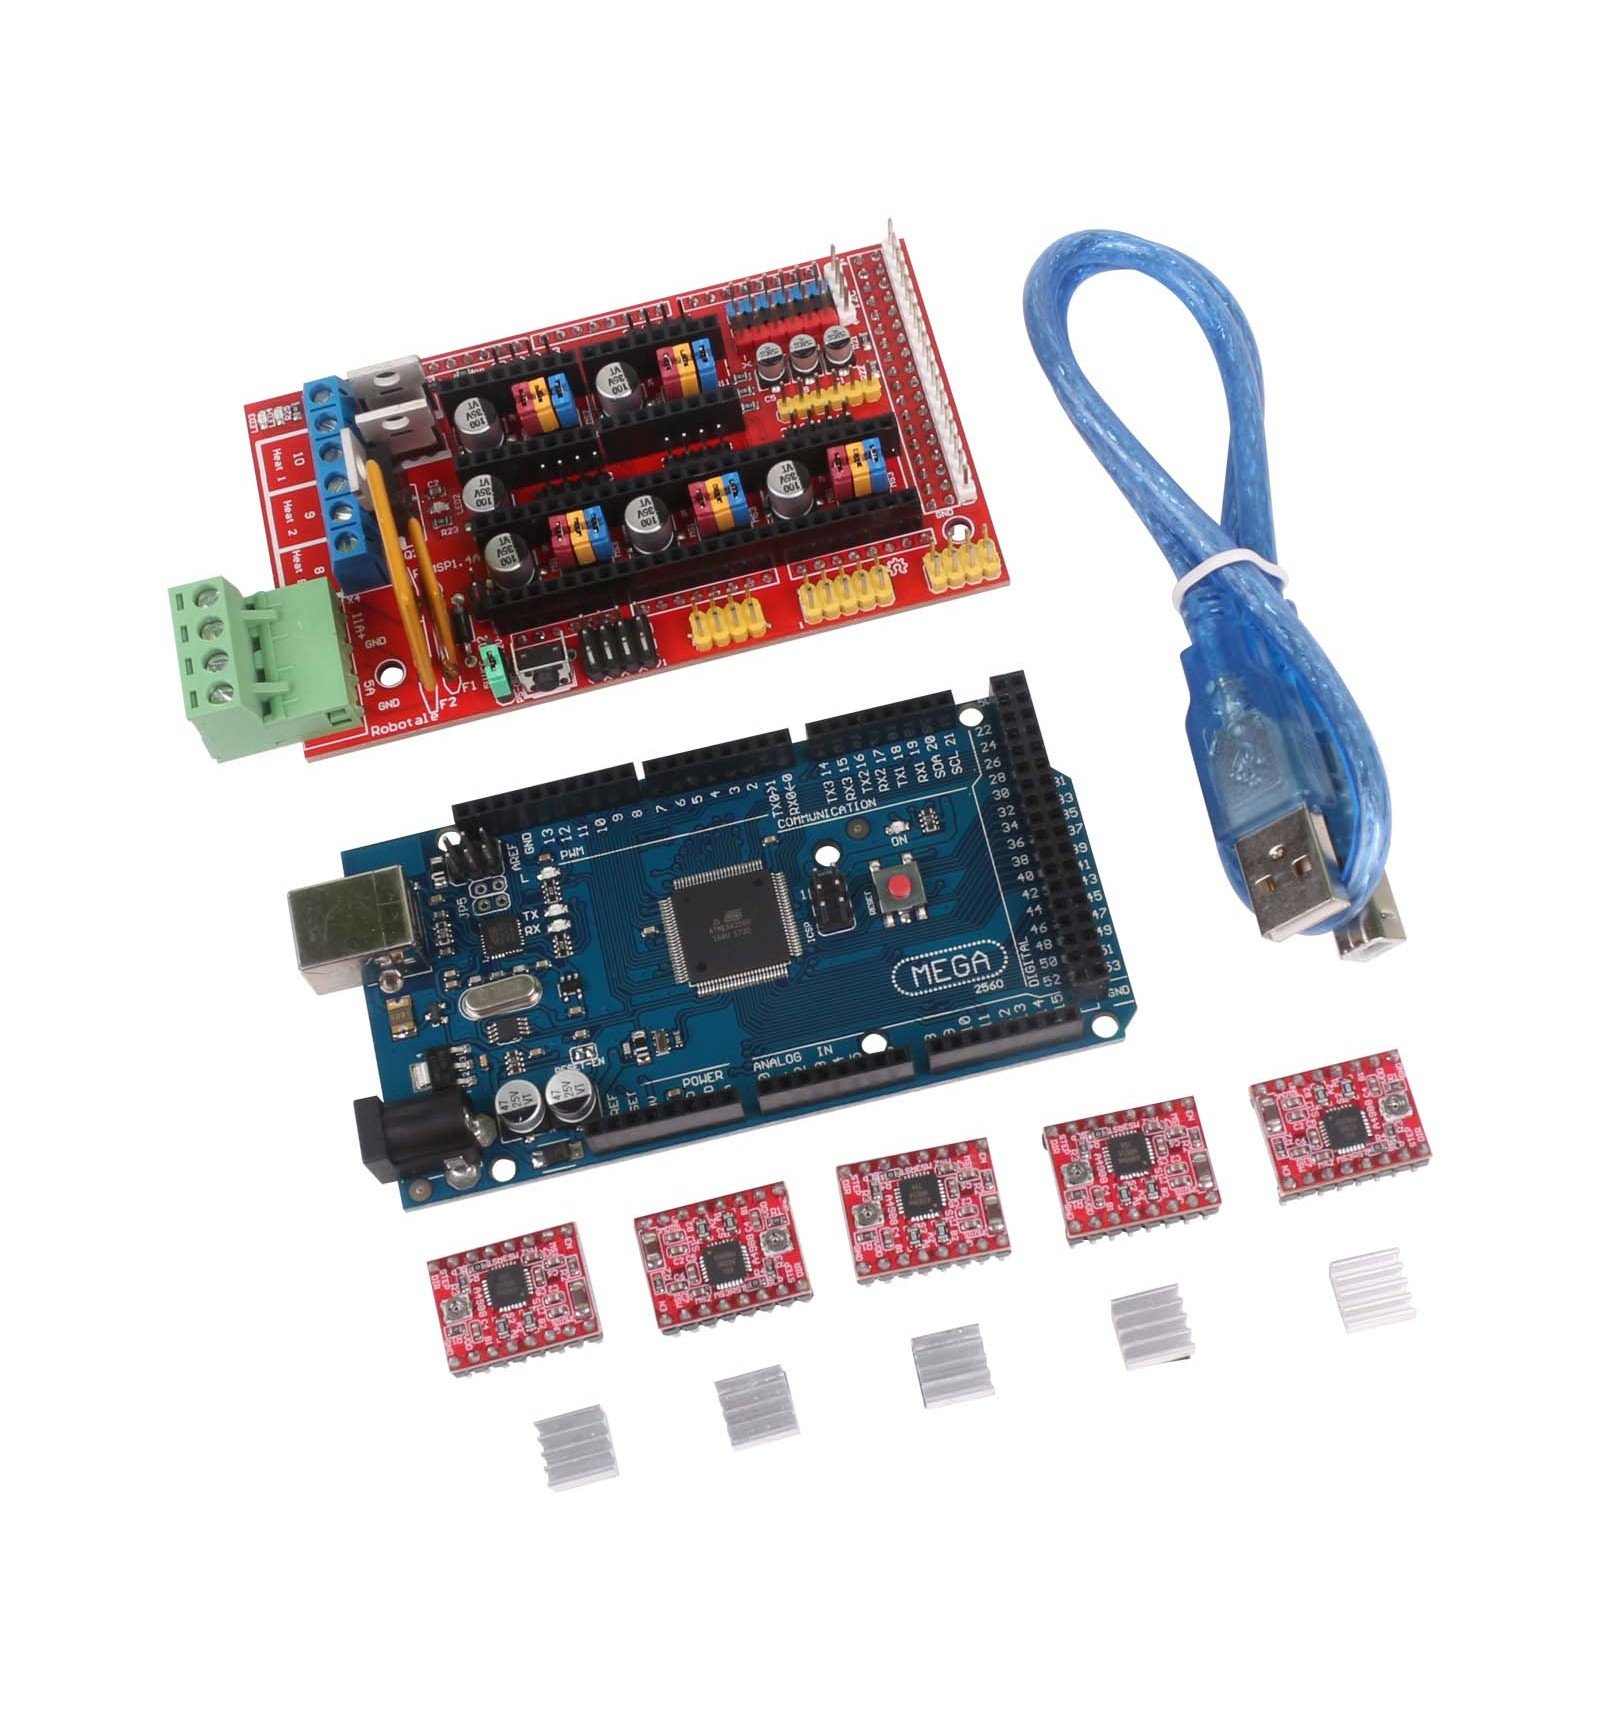
RAMPS 1.4 Kit with Arduino Mega & 5x A4988 Drivers
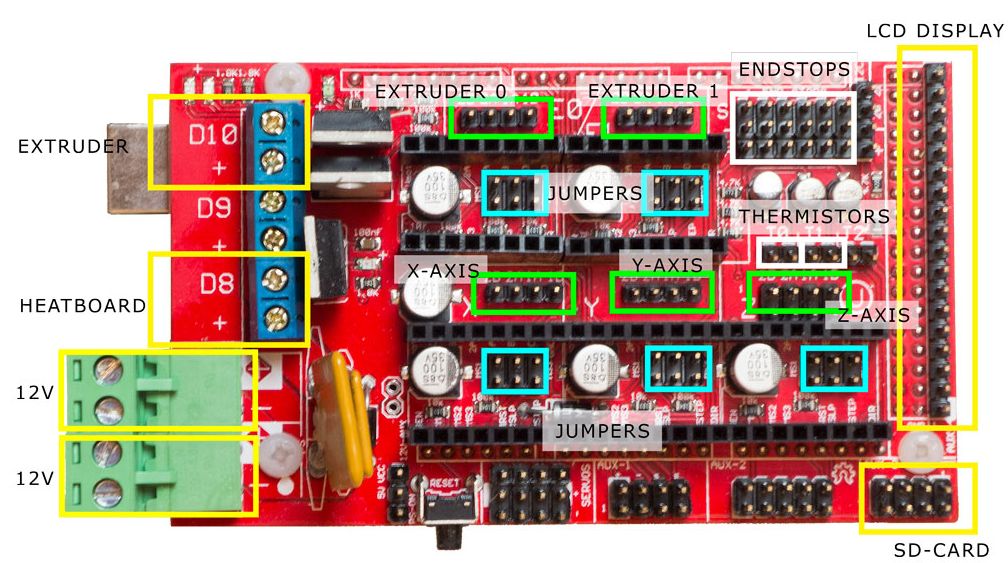
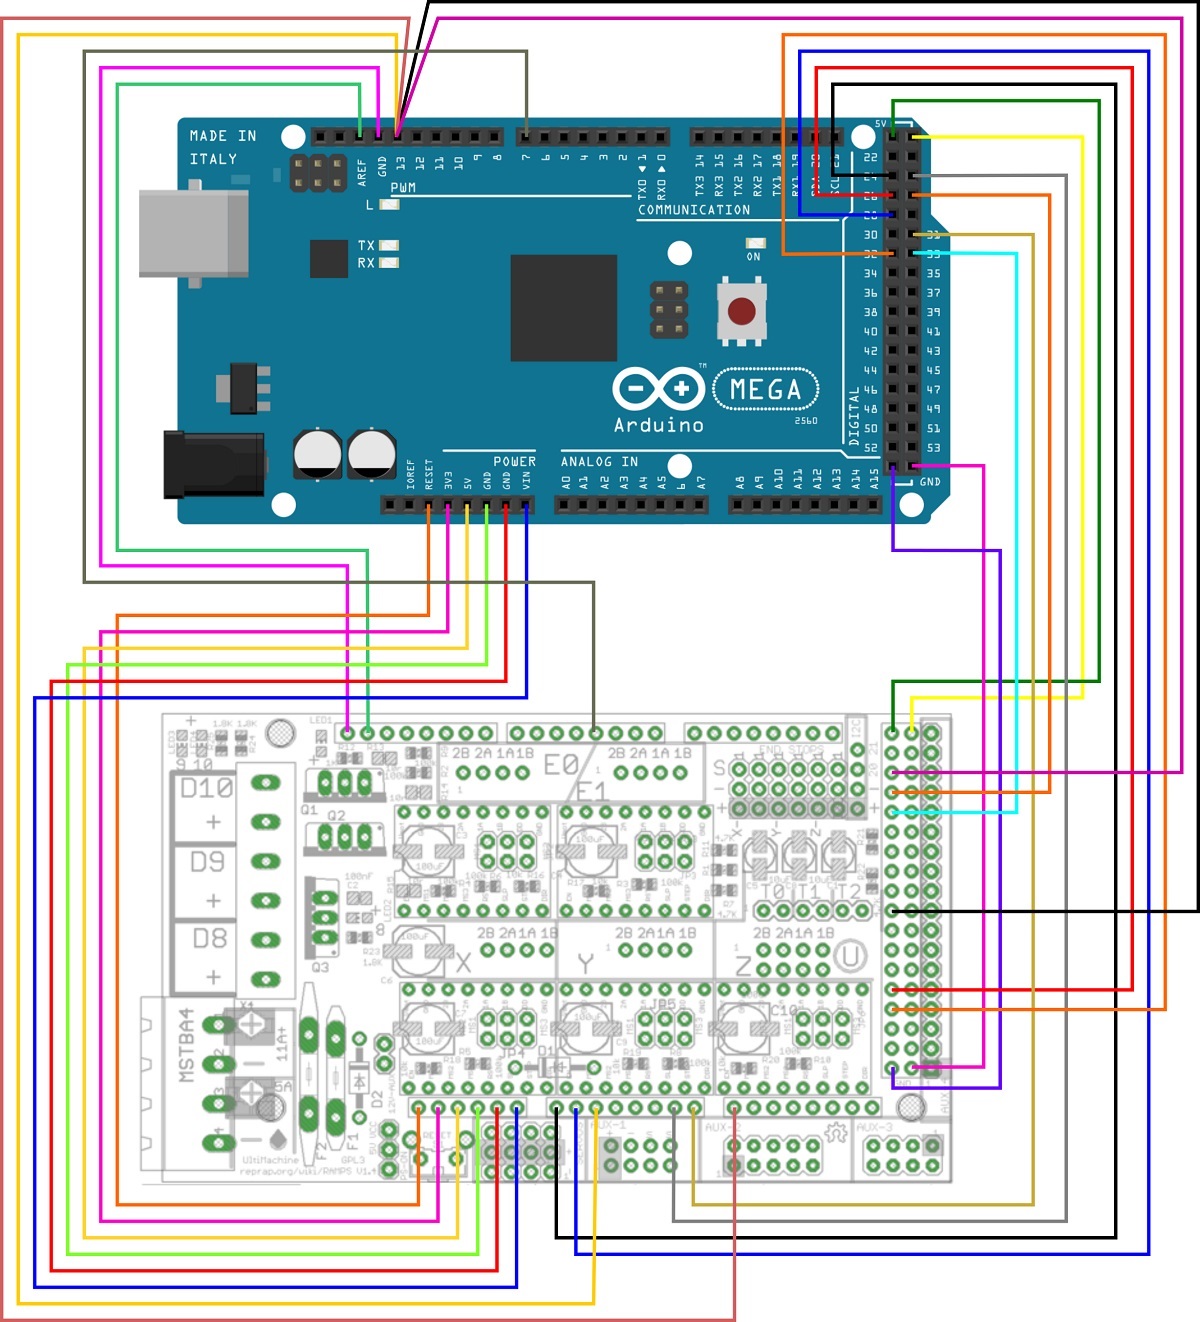
LCD-display. 2. SCHEMATIC DRAWING First you have to connect the Arduino MEGA with the Ramps 1.4 expansion board. Plug the board on the Arduino that way that the pins on the. For the Ramps 1.4 board is the following configuration intended: #define BOARD_RAMPS_14_EFB 43 //RAMPS 1.4(Power outputs: Hotend,Fan,Bed)
Arduino MEGA Shield RAMPS
If you build up a 3d printer from scratch, you must install a firmware on the controller board. This article descripes the steps when you install the Marlin firmware on a RepRap controller using the combination of an Arduino Mega 2560 and the RAMPS 1.4 shield. Preconditions:

Keyestudio Ramps 1.4 Shield 3D Yazıcı Kontrol/ Reprap Mendelprusa
RAMPS 1.4 board; Taurino board - based on Arduino but can handle higher voltage and current; RepRap wiring kit, with 1 metre wires. You can make your own cables, but the wiring kit is cheap and easy. 4 x DRV8825 stepper drivers; 6 x opto endstop boards - I used ones from the original RepRap, but various other opto endstop boards will work

a4988 接線 a4988 arduino Ophrafit
B1Gtone January 13, 2017, 1:52pm 1. I have a spare Arduino Mega 2560 with RAMPS 1.4 board and a Reprap Smart controller and LCD that came from a 3D printer. I am trying to control stepper motors, servo's and an LCD panel without using MARLIN Firmware. I have never used Arduino before but by reading tutorials etc, I have managed to get four.
Process Engineering Equipment Business, Office & Industrial Supplies
Upload the programmed project in the mega board. Do not be impatient to plug the ramps 1.4 board on the mega2560,it is unwise.When you upload the the project on the mega board,just Connect the Mega board on your computer I did no open the arduino 1.0.1 software,Instead,I just find the marlin.ino file and dblclick. C:\arduino-1.0.1\examples.

Buy KEYESTUDIO 3D Printer Controller Board RAMPS 1.4 REPRAP Mendel
GRBL 0.9j for Arduino Mega 2560 and RAMPS 1.4. This port was initally developed by ArSi [email protected] but has been enhanced to also support Arduino Mega 2560 + RAMPS 1.4 Board (including limit switches, homing and probing support). It's based on Grbl v0.9j Atmega328p 16mhz 115200baud with generic defaults (2016-03-17).

Description for Arduino 2560 with RAMPS 1.4 Technical descriptions
The RAMPS 1.4 kit comes with the following components: Arduino Board Mega 2560 (generally a cheap knockoff) which is the blue board you see above. RAMPS 1.4 Shield which will sit on top of the Arduino which is the red board above (yes the yellow fuses come bent like that don't worry) Jumpers (the little black thingies above)

Arduino Mega + Ramps 1.4 + 4 Drivers A4988 Mercado Libre
00:00:00 - 00:52:00 secs - Intro to Ramps 1.4 Board. Parts and Motors overview 00:52:00 - 01:54:00 secs - Jumper installation. Mount the RAMPS 1.4 Board onto the Mega 2560 board. The headers and pins on each board may need some adjustments to align properly.. If your kit came with a LCD smart controller, the hardware installation.

Плата расширения ЧПУ Arduino Mega RAMPS 1.4, цена 149,76 грн., купить
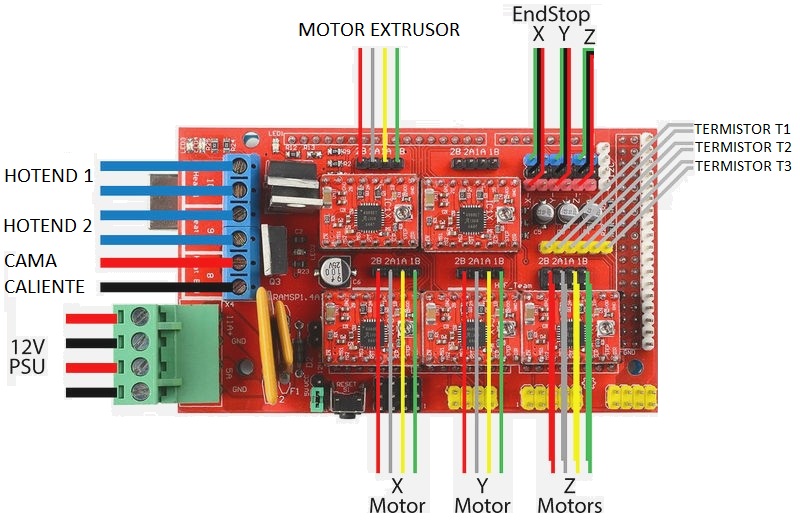
It consists of a RAMPS 1.4 shield, an Arduino Mega 2560 board (or a clone), and a max. a fan (or a second hotend), a LCD controller, a 12V (or 24V with appropriate modification) power supply, up to three thermistors, and up to six end stoppers. RAMPS 1.4 Schematic, taken from www.makerfarm.com . 1. Insert jumpers to RAMPS 1.4

Arduino Mega + Ramps 1.4 + 4 Drivers A4988 Mercado Libre
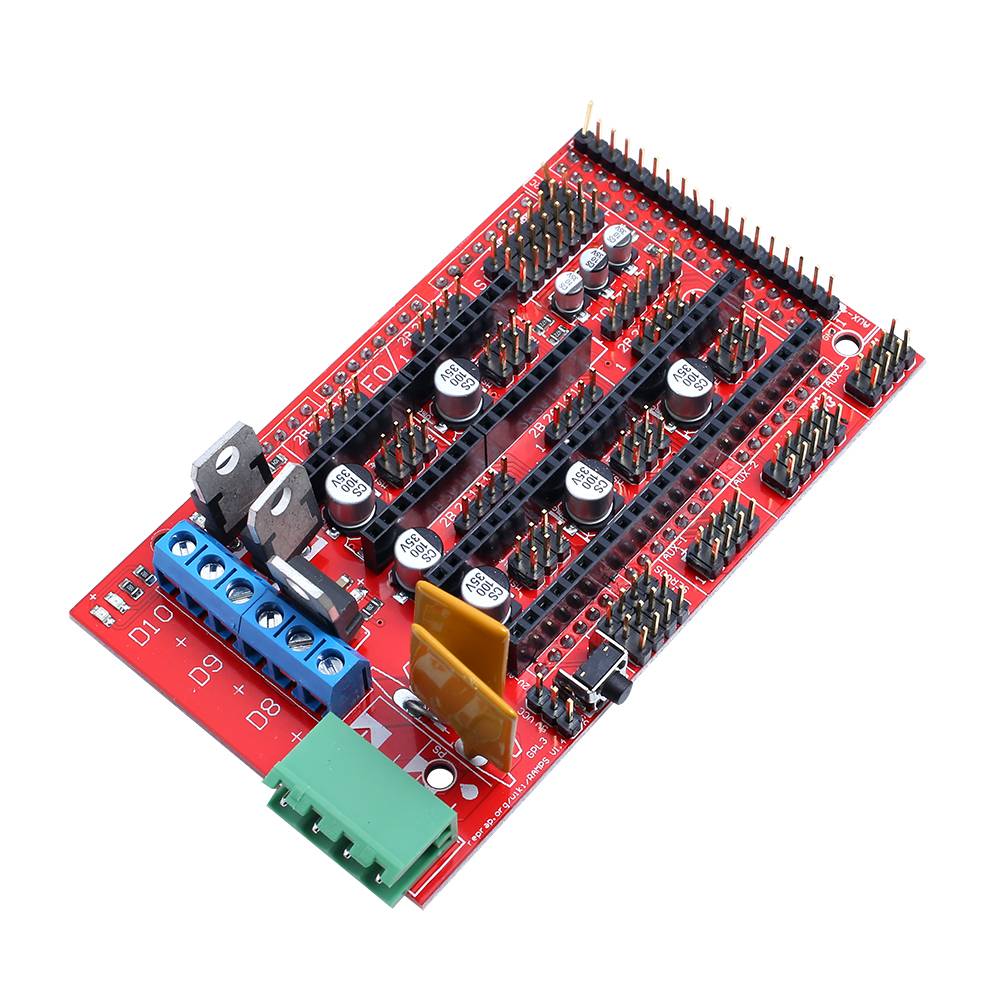
The RAMPS 1.4 board is an upgrade to v1.3 as it now uses surface mount LEDs, resistors, and capacitors. Documentation: Demo video running the ramps for printing. Reprap wiki page about ramps 1.4; Shipment: Does not include the required Arduino (1280 or 2560) or A4988 stepper drivers. This RAMPS 1.4 board is fully assembled.
Arduino Mega 3D Printer RepRap A4988 CNC RAMPS 1.4 Shield
The new MKS Base 1.2 3D Printer Controller board combines and improves the assets of the RAMPS 1.4 and Arduino Mega 2560 boards on a fantastic single board solution. The MKS Base 1.2 is an optimal 3D printer controller solution for your Reprap 3D Printer. 2.Features • The MKS Base 1.2 solves interface connection problems between the Arduino.
Fabacademy 2016
Download preconfigured configuration.h for the 12864 or 2004 LCD without autoleveling for Marlin 1.1.x: Updated for Marlin 1.1.9! Contents1 Installing Arduino IDE, Download Marlin2 Mandatory changes2.1 Changing the board2.2 Setting up the display3 Optional changes3.1 Baudrate3.2 Giving the printer a name3.3 Setting up the extruders3.4 Setting up the thermistors3.5 PID-control3.6.

3D Printer Controller Board RAMPS 1.4 Arduino Mega Shield RepRap Prusa
In Tools->Port select the COM port which associated with Arduino Mega2560 (see picture below) Step 5) Download Ramps1.4 board Marlin firmware as per your LCD screen type. Step 6) In Arduino IDE->File->Open, find Marlin Folder and open Marlin Arduino File (Marlin.ino)

MODULO SHIELD ARDUINO COMPATIBLE RAMPS 1.4 PLACA CONTROLADORA CNC 3D
Arduino Mega 2560 R3 RAMPS 1.4 ATX 230W power supply Rep Rap Full Graphics LCD Controller Repetier Firmware Repetier Host With the USB cable attached to the laptop the LCD screen functions properly, with or without the ATX power supply turned on. To operate the extruder heater and print, I need to turn on the power supply (obviously).

Купить Ramps 1.4 RAMPS 1.4 для Arduino Mega 256016 U2 в Украине
You could test the Arduino Mega 2560 by connecting it over USB to e.g. Pronterface, you do not need the LCD for testing the Arduino Mega and the RAMPS. The LCD could be tested separately by creating a sketch in Arduino IDE and connect the correct pins of the LCD cable to some pins of an Arduino device, e.g. load the the U8Glib example sketch.
